


Root Cellar Part 2: Foundation and Stairs

Updated: Aug 20
Welcome Back to Our Root Cellar Project: Part 2
Now that the excavation is complete, we are ready to delve into the crucial aspects of constructing the foundation and the stairs that will lead into our newly excavated space.
This project has not only been a significant undertaking but also an intense family endeavor that has brought us closer together. Each member of our family has played a vital role, contributing their unique skills and perspectives to the process. From measuring and digging to planning and discussing design ideas, this root cellar has become a symbol of teamwork and shared purpose. The satisfaction of seeing our hard work take shape has been incredibly rewarding, and we are excited to continue this journey with you.

The first step in our foundation preparation process involved backfilling the area with a substantial layer of 2 inches of gravel. This initial step is crucial as it provides a stable base and facilitates proper drainage, which is essential for preventing water accumulation that could compromise the integrity of the foundation over time. As I mentioned in the previous post, we encountered an important realization that necessitated further excavation. Specifically, we determined that we needed to dig a deeper footer trench along the edges of the foundation. To achieve this, we carefully excavated an additional 6 inches down, ensuring that the trench width extended to 12 inches from the edge. This increased depth and width of the footer are vital because they enhance the overall strength and stability of the foundation, allowing it to effectively support the considerable weight of the walls that will be constructed above.
Once the trench was adequately prepared, we proceeded to build a sturdy frame using 2×6 boards. This frame serves a critical function: it holds the concrete in place until it has the opportunity to cure and dry properly. To ensure that the frame remains secure and does not shift or become distorted due to the immense pressure exerted by the wet concrete, we reinforced it with deep stakes driven firmly into the ground. This added support is essential, as the force of the concrete can be quite significant, and any movement could jeopardize the alignment and integrity of the foundation.
It is also important to note that we only excavated footers in the areas where the walls would be constructed. For the sections designated for the door and the front porch, we opted to maintain the original depth of the excavation. This decision was made based on our assessment that these areas would not bear the same level of weight as the primary walls and stairs. By leaving the original depth intact in these specific locations, we are optimizing our resources while still ensuring that the foundation is appropriately designed to handle the varying loads across the entire structure. This strategic approach not only conserves materials but also ensures a solid foundation tailored to the specific needs of our building project.
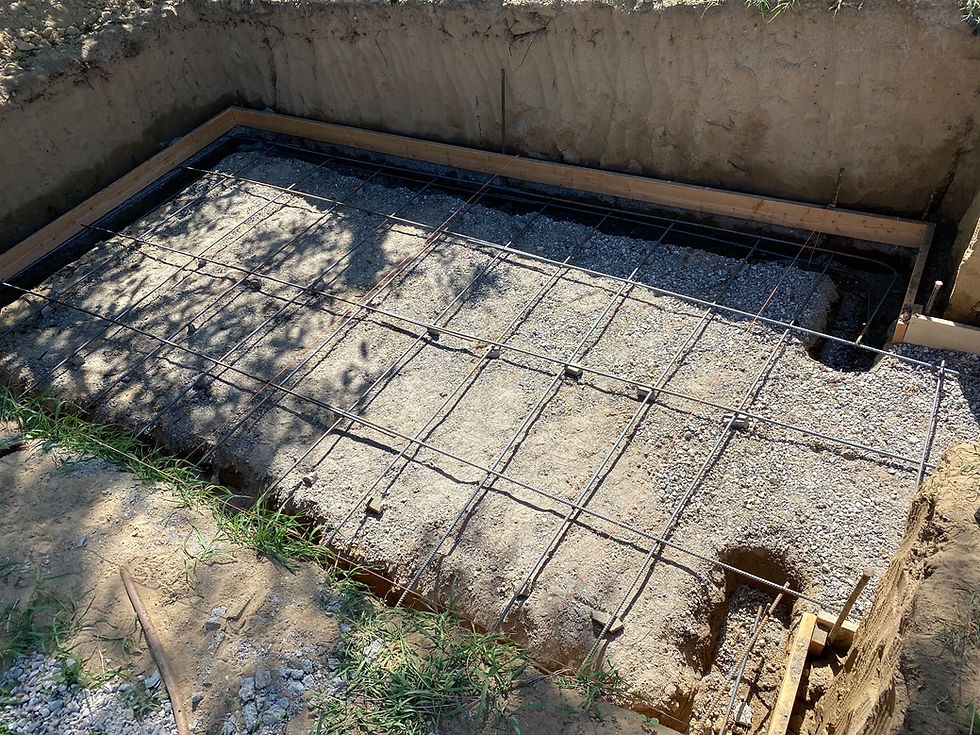
Now that the frame was built, the next critical step in our construction process was to install the rebar supports. Rebar, short for reinforcing bar, is an essential component in concrete construction as it significantly enhances the strength and stability of the concrete, thereby improving its overall structural integrity. The incorporation of rebar helps to resist tensile forces that concrete alone cannot withstand, making it a vital element in ensuring the durability and longevity of the structure we are building. To achieve the best results, it is imperative that the rebar is positioned correctly within the concrete mix. Specifically, the rebar must be placed in the center of the concrete slab. This positioning is crucial because if the rebar is too close to the surface, it becomes susceptible to rust and corrosion, which can lead to the degradation of the concrete over time. Rust can create cracks, ultimately compromising the structural integrity of the entire project. There are specialized supports available that can assist in maintaining the rebar in the correct location during the pour. These supports, often referred to as rebar chairs or spacers, are designed to elevate the rebar off the ground and ensure it remains centered within the concrete. However, in our case, we opted to devise our own solution, showcasing our resourcefulness and adaptability in the construction process. We placed #4 rebar deep into the footers, which are the foundational elements of our structure, providing a solid base for the rest of the construction. Additionally, we created a grid pattern across the entire floor area. This grid is not only functional but also essential for distributing loads evenly across the slab. It is generally recommended to space the rebar grid approximately 1 to 2 feet apart, depending on the specific requirements of the project and the expected loads. Moreover, it is crucial to ensure that the entire perimeter of the root cellar floor is adequately covered with this rebar grid. This comprehensive coverage helps to prevent any weak points in the concrete, which could lead to cracking or settling over time. By taking these meticulous steps in the installation of the rebar, we are laying a solid foundation for the root cellar, ensuring it can withstand the test of time and environmental pressures. Properly executed, this phase of construction will contribute significantly to the overall success and durability of our project.
My husband came up with an inexpensive and ingenious way to bend rebar using just a few simple items we had on hand, but it’s worth noting that there are also high-quality rebar benders available on the market for those who prefer a more professional tool. His method is not only cost-effective but also quite practical for DIY projects around the home or on the job site. He started by cutting a precise groove in a sturdy piece of wood, ensuring that the width of the groove matched the diameter of the rebar exactly. This attention to detail is crucial, as it allows the rebar to sit securely within the groove without slipping or shifting during the bending process.
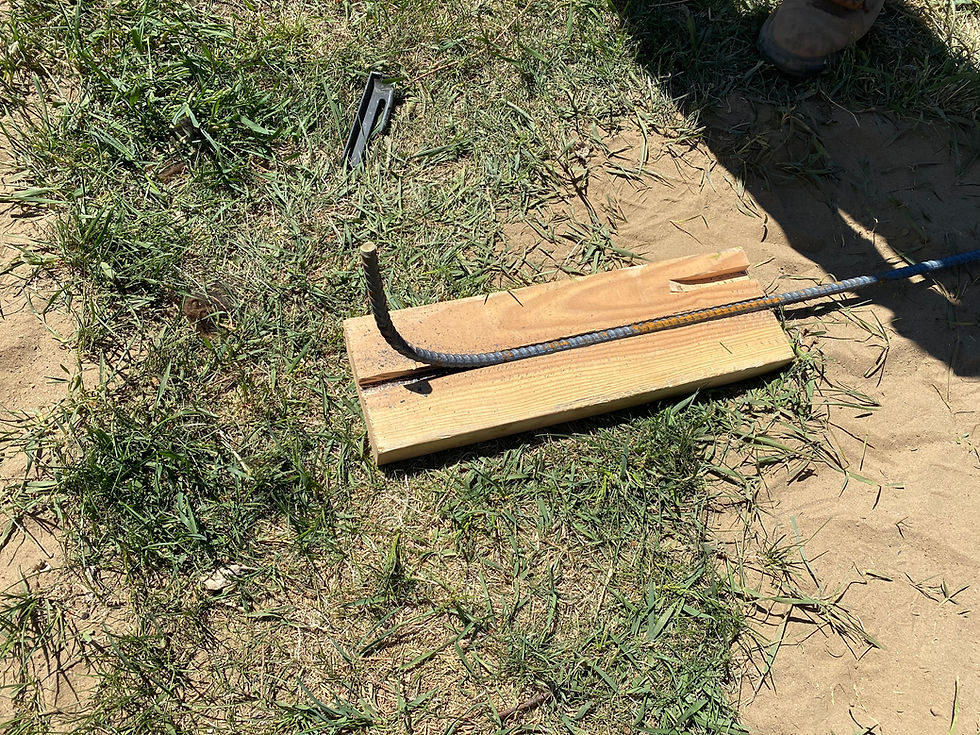
Once the groove was prepared, he carefully placed the rebar into it, allowing one end to extend beyond the edge of the board. To further stabilize the rebar and ensure an even bend, he sandwiched it between another board. This second board was positioned slightly off from the end of the rebar, creating a leverage point that would be essential for the bending process. The arrangement of the boards not only held the rebar in place but also provided a solid surface that would withstand the force applied during bending.
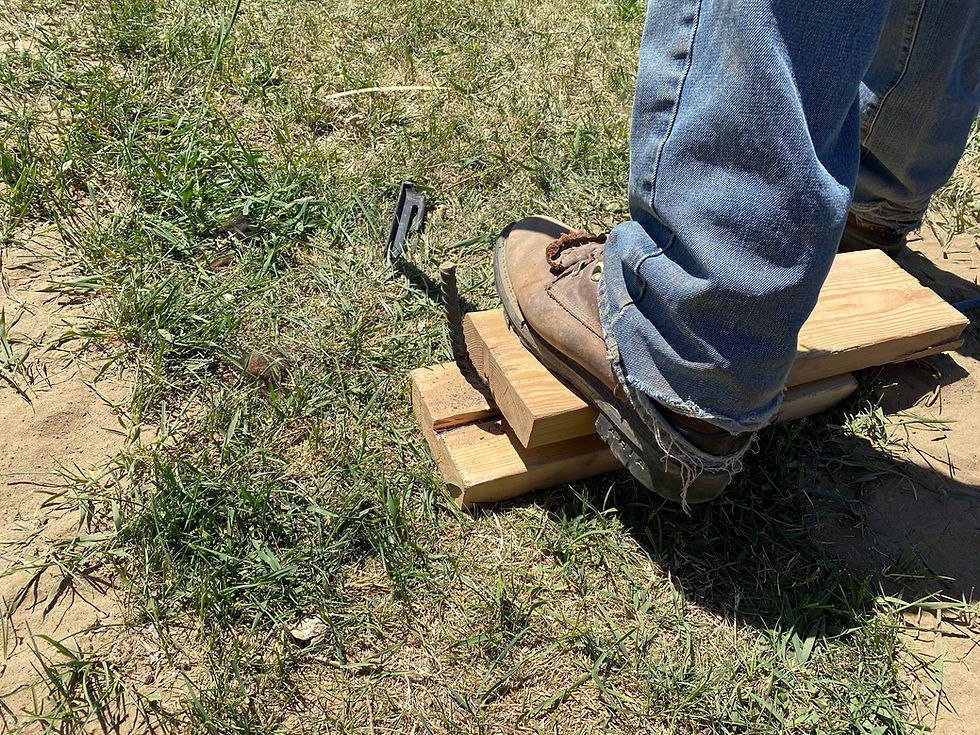
At this point, he took a strategic step by placing one foot firmly on top of the sandwiched boards. This action served two important purposes: it kept the boards together, preventing them from separating or moving apart, and it provided additional weight and stability, which is critical when applying force to bend the rebar. The use of body weight in this manner is a clever workaround for the lack of specialized equipment.
Next, he introduced a metal pipe into the equation by sliding it over the exposed end of the rebar. The length of the pipe acted as a lever, amplifying the force he was able to exert. As he pulled the pipe upward toward the boards, the rebar began to bend smoothly and evenly. This simple yet effective technique allowed him to create a perfect curve, which was essential for our project, as we needed to connect multiple pieces of rebar at various angles. The ability to bend the rebar accurately ensured that all the pieces would fit together seamlessly, providing the structural integrity necessary for our construction needs.
Overall, this method not only showcased my husband’s resourcefulness but also highlighted how with a little creativity and the right approach, one can achieve professional results without the need for expensive tools. It’s a testament to the idea that sometimes the simplest solutions can be the most effective, especially when it comes to home improvement and DIY projects.
Root Cellar Concrete Foundation:
With the rebar in place, we were ready for the concrete truck, but we faced a problem. Deliveries were unavailable for two months unless you were a contractor. Since we aren't contractors, we got on a cancellation list and, fortunately, only waited a few days before receiving a call. However, this meant we weren't expecting the call.
My husband had to leave work early to handle the task. We hadn't acquired all the necessary equipment yet, including a large float, which is essential for this type of work. Additionally, I was busy recording canning videos that day, so I couldn't assist. Had I known about his difficulties, I would have postponed the recordings to help him.
He used long straight boards and a trowel to level the concrete, but since he was alone and inexperienced, it dried faster than he could manage. For a structure of this size, at least two people and the right equipment are recommended. Not only did the surface have more irregularities than desired, but he wore old work jeans with holes in the knees, allowing the lye from the concrete to irritate his skin. He used rubber boots and large rubber gloves, which helped, but it wasn't enough. Please learn from his mistake and protect all your skin. If concrete gets on your skin, wash it off immediately.
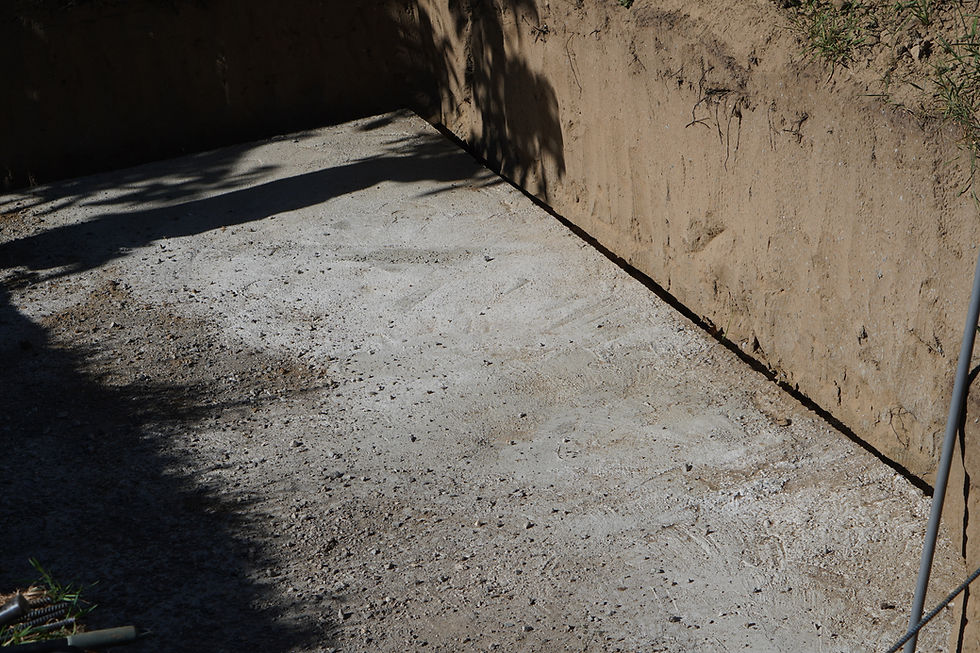
Fortunately, we can use a concrete leveling component later to achieve the smooth floors we want. (The photo also shows some gravel that will easily sweep off from when we worked on the stairs.)
The next step was removing the wood frame. This was more challenging than expected because there wasn't much room to fit a screwdriver to remove the screws. Hitting the boards with a mallet helped break the bond with the concrete. We then had to carefully lift the board off the concrete. Pry bars worked well for this, but it was still tough work. If you had a Sawzall , you might cut through the screws. Another option is to dig a larger hole initially.
With the root cellar floor complete, we needed to install the stairs. This had to wait until after our trip to visit my brother in Louisiana. Unfortunately, on the last day of our vacation, an infection from my husband's concrete injuries spread to the bursa in his knee, requiring an ER visit and making it impossible for him to kneel for a while. Once he recovered, we resumed work on the root cellar.
Root Cellar Stairs:
Finally, we moved on to constructing the stairs. We began by digging a ramp-like incline about 1 foot deeper than the desired top of the stairs. We then added 2 inches of gravel on the incline and constructed a frame for our concrete stairs.

We decided to make the stairs wider, opting for deeper steps as a trade-off. Our stairs are approximately 10 inches deep. Although the general recommendation is 7-8 inches, we felt that 10 inches was reasonable for our needs. We created the frame by determining the necessary angle. This area was somewhat limited because we aimed to align it with our cobblestoned area.
We wanted the stairs to overlap the porch sufficiently to connect them to the previously poured floor. We then spaced the stairs and used a level to first mark and then position all the stair boards at equal distances along the side boards.

After placing the stair frame, we added a steel mesh underneath to provide additional adherence for the concrete, enhancing the strength of the stairs.
We then used a concrete drill to drill holes into the porch, allowing us to connect the two sections.
The holes need to be cleared, and rebar pieces cut to fit within the stair area.
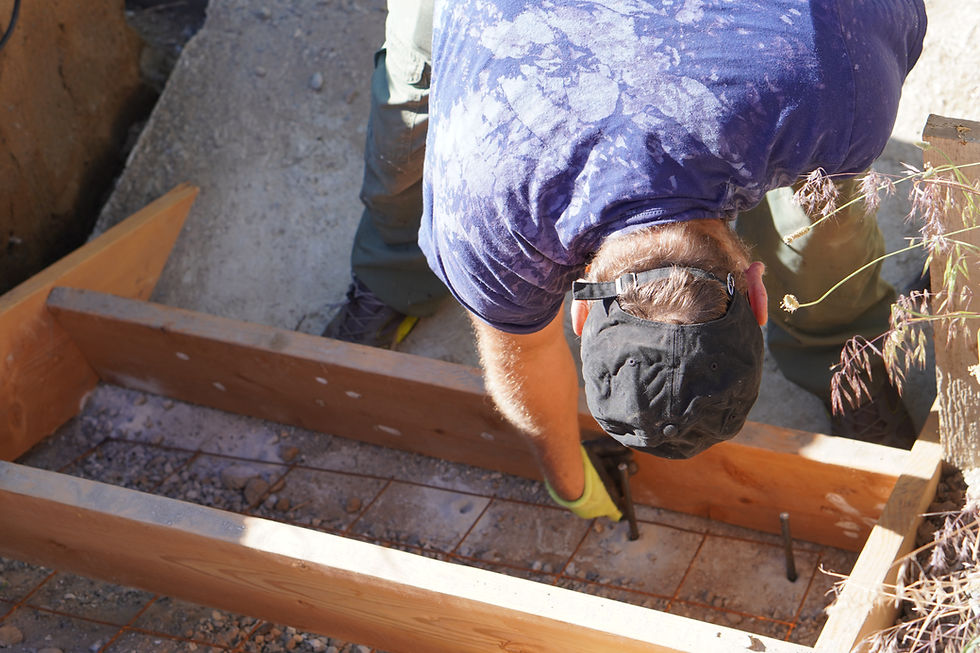
Next, you should epoxy the small rebar pieces into the holes you created. These will help secure the two concrete sections together.
We also placed cinder blocks at the bottom to help hold the frame in place. We were then ready to pour the concrete. We used a slightly wetter mix as it flows better. I highly recommend using a concrete vibrator to help remove the air bubbles. We didn’t acquire ours until after this pour, and I believe it would have been much better if we had it earlier, as there were air bubbles that we didn’t notice until later, despite our best efforts to avoid them during the process. We angled our stairs slightly forward to prevent water from pooling on them.
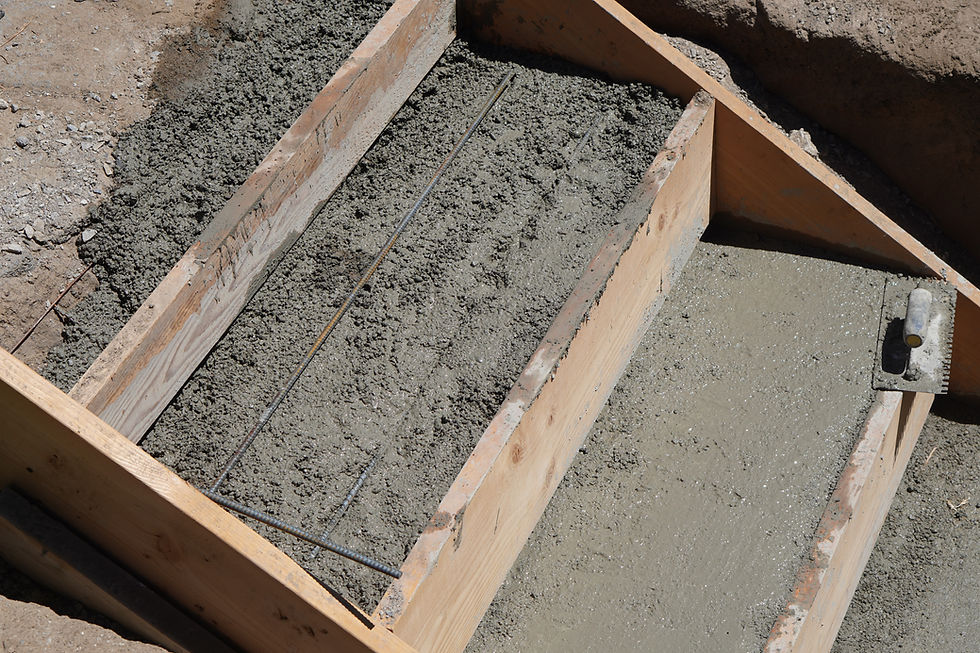
For each stair, we added two pieces of rebar lengthwise, suspended in the mix.
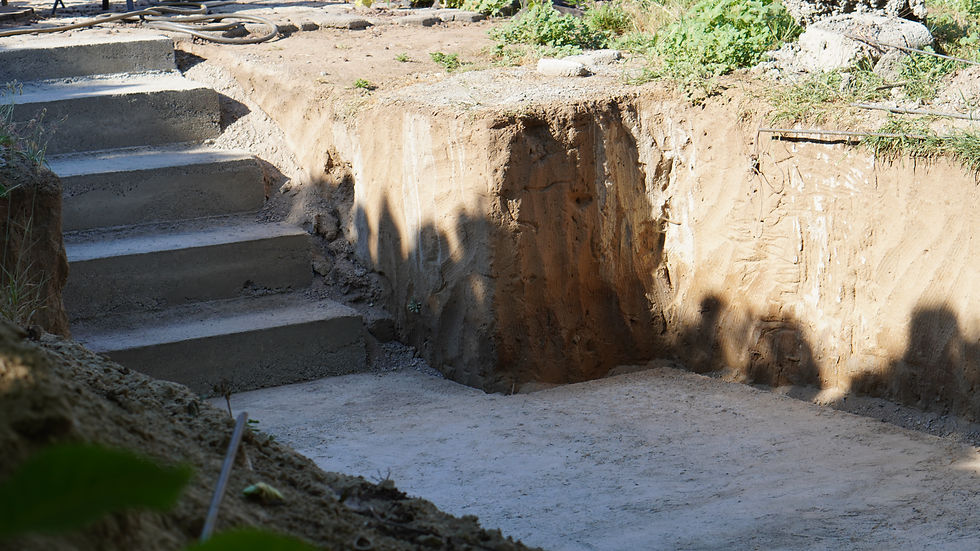
The final step was removing the frame to see the results. Be gentle with the corners, as they are more prone to chipping. We made our stairs extra wide to allow our bricks to cover the edges when we install our stairwell retaining wall.





Comments