


Pressure Canning Green Beans

Updated: Aug 31
Green beans are one of those garden foods that seem to arrive all at once. One day you’re picking a handful for dinner, and three days later you’ve got a basket on the counter and no room left in the fridge.
That’s where pressure canning earns its spot in the kitchen.
For quart jars of green beans, the classic method is simple: add 1 teaspoon of salt to each quart jar and process for 25 minutes at 10 pounds of pressure, as long as that pressure matches your canner type and altitude. The salt is for flavor, not preservation. The real safety step is the pressure canning process itself.
Green beans are a low-acid food, so they must be pressure canned. A boiling water bath isn’t safe for plain green beans, even if the jars seal. Pressure canning gets the food hot enough to make it shelf stable when done correctly.
Let’s walk through the whole process in a clear, no-panic way.
What to know before canning green beans
Green beans are low-acid vegetables. That means they need higher heat than boiling water can provide. A pressure canner creates that higher temperature under pressure.
For quart jars, the processing time is 25 minutes.
The “10 pounds of pressure” part needs one careful note. Many weighted-gauge canners use 10 pounds of pressure at lower elevations. If you live at a higher altitude, you may need to increase the pressure. Dial-gauge canners may also use a different pressure setting, often 11 pounds at lower elevations.
So before you start, check your canner manual or a trusted canning guide for your altitude. The goal is simple: follow the correct pressure for where you live.
A few other things to know:
Use a pressure canner, not a pressure cooker or electric multi-cooker.
Use fresh, crisp green beans.
Salt is optional for safety, but gives it flavor.
Jars must be clean and free of chips or cracks.
Lids should be new and unused. (For quality, American made Superb canning lids and jars follow this link and use the coupon code WP20 to get 20% off your purchase.)
If you’re gathering supplies, these are handy basics to have nearby:
You don’t need fancy equipment, but you do need the right equipment. That’s especially true with low-acid foods like green beans.
Choosing and preparing the green beans
The best jars start with good beans. Choose green beans that are fresh, firm, and free from spots, mold, or slimy patches. If the beans are limp or overgrown with tough pods, save those for another use. Canning won’t make old beans taste fresh again.

Wash the beans well under cool running water. Garden beans can hold dirt in the seams, so don’t rush this part.
Next, trim off the stem ends. You can also remove the tips if you like, though that’s mostly personal preference. Cut or snap the beans into pieces that fit easily into quart jars. Pieces around 1 to 2 inches are easy to pack and easy to serve later.

You have two packing options: raw pack or hot pack.
Raw pack green beans
Raw pack means you put the uncooked green beans directly into the jars, then cover them with boiling water.
This method is quick and popular because it saves a step. The beans may shrink during processing, so you might notice more floating in the jar after canning. That’s normal.
Hot pack green beans
Hot pack means you briefly boil the green beans before filling the jars. Usually, this gives you a tighter pack because the beans shrink before they go into the jar.
Hot pack can also help remove some air from the beans before processing. The jars often look a little fuller and neater when they’re done.
Both methods are commonly used. If you want simple and fast, raw pack is fine. If you want a fuller-looking jar, hot pack is worth the few extra minutes.
Filling quart jars with 1 teaspoon of salt
Set your clean quart jars on a towel or heat-safe surface. Keep the jars warm so they don’t crack when you add boiling water.
Add 1 teaspoon of canning salt to each quart jar. Use canning salt or pickling salt if you have it. Table salt can contain anti-caking ingredients that may cloud the liquid, though it doesn’t usually ruin the food.
Again, the salt is for taste. It doesn’t make the green beans safe. The pressure canner does that job.
Pack the green beans into each jar. Don’t crush them down hard, but do fill the jar well.

Then add boiling water, leaving 1 inch of headspace at the top of each jar. Headspace is the empty space between the food or liquid and the rim of the jar. That space matters because the contents expand during processing.
After the water is in, slide a bubble remover or clean plastic utensil down the inside edges of the jar. This releases trapped air bubbles. Add more boiling water if the level drops, keeping that 1 inch of headspace.
Wipe each jar rim with a clean damp cloth. This removes salt, starch, or tiny bits of food that could stop the lid from sealing.
Place a new lid on each jar, then screw on the band until it’s fingertip tight. Don’t crank the band down hard. Air needs to escape from the jar during processing.
Here’s a quick jar-filling checklist:
Step | What to do |
Salt | Add 1 teaspoon canning salt per quart jar |
Beans | Pack trimmed green beans into the jar |
Liquid | Cover with boiling water |
Headspace | Leave 1 inch at the top |
Bubbles | Remove trapped air |
Rim | Wipe clean before adding the lid |
Band | Tighten fingertip tight |
That’s the part where things start to feel satisfying. Jars lined up, beans packed, lids ready. Now the pressure canner takes over.
Processing green beans for 25 minutes at 10 pounds pressure

Before loading the jars, add the amount of hot water your pressure canner manual calls for. Many pressure canners use a few inches of water, not enough to cover the jars. Most use somewhere around 3 quarts of hot water. Pressure canning is different from water bath canning.
Place the rack in the bottom of the canner. Don’t set jars directly on the bottom. Load the filled quart jars into the canner with a jar lifter, keeping them upright.
Lock the lid in place. Leave the weight off or the vent open, depending on your canner style.
Turn the heat up and let steam vent in a steady stream for 10 minutes. This step matters because it pushes air out of the canner. Trapped air can lower the temperature inside the canner, even when the gauge looks right.
After the 10-minute venting period, add the weight or close the petcock according to your canner instructions. Let the canner come up to pressure.
Once it reaches the correct pressure, start your timer for 25 minutes.
That means processing quart jars of green beans for 25 minutes at 10 pounds of pressure. Don't forget to adjust your pressure if you are at higher altitudes.

Keep the pressure steady. Small changes are normal, but don’t let it drop below the required pressure. If it drops too low at any point, bring it back up and restart the full processing time. Annoying, yes, but it’s the safe move.
Try not to babysit the dial every second, but stay close. Pressure canning isn’t the time to run errands, take a shower, or start a long phone call in another room.
When the 25 minutes are finished, turn off the heat. Do not remove the weight. Do not open the vent. Do not run cold water over the canner.
Let the pressure return to zero naturally.
Once the pressure is fully down, wait a few more minutes. Then remove the weight or open the vent. Unlock the lid carefully and tilt it away from your face. Steam burns are no joke. Allow the jars to cool for 10 more minutes.
Use a jar lifter to remove the jars. Place them on a towel with space between each jar. Don’t tilt them, tighten the bands, or press the lids.
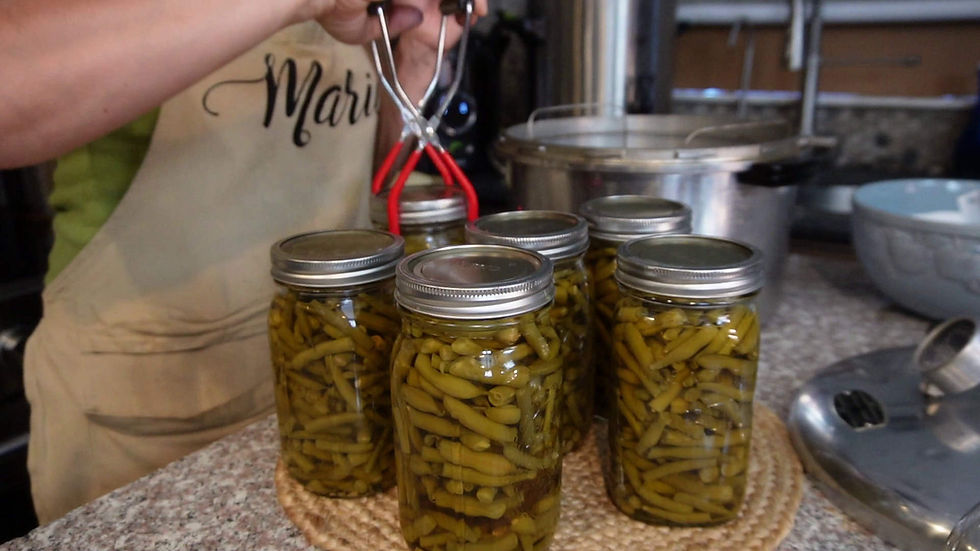
Now let them sit undisturbed for 24 hours.
Cooling, sealing, and storing the jars
The popping sound is one of the best parts of canning. It usually means the lids are sealing as the jars cool.
After 24 hours, check each seal. The lid should be curved downward and should not flex when you press the center. Remove the bands and lift each jar gently by the lid, just an inch or so above the counter. If the lid holds, the jar is sealed.
If a jar didn’t seal, put it in the refrigerator and use it within a few days. Don’t try to store an unsealed jar on the shelf.
Wipe the jars clean, remove the rings, label them, and write the date. Store them in a cool, dry, dark place. A pantry, cupboard, or basement shelf can work well as long as it’s dry and not exposed to big temperature swings.
For best quality, use home-canned green beans within about a year. The food may stay sealed longer, but flavor and texture are usually better when you rotate your pantry.
Before eating any jar of home-canned green beans, check it carefully.
Do not taste from a jar if you notice:
A loose or bulging lid
Leaking liquid
Spurting when opened
Mold
A strange smell
Foamy or cloudy liquid that doesn’t seem normal
Food that looks badly discolored
When in doubt, throw it out. That rule might feel wasteful, but it’s the right call with low-acid canned foods.
Tips for better flavor and texture
Plain canned green beans are simple, but they don’t have to be boring. The salt helps, and using fresh beans helps even more.
Here are a few ways to get better jars.
Use beans at their peak
Young, tender beans can better. Overgrown beans may turn stringy or tough after processing.
Don’t overpack the jars
It’s tempting to cram in as many beans as possible, but water needs to move around the food during processing. Pack them firmly, not forcefully.
Stick with plain beans in the jar
Avoid adding bacon, butter, flour, thickeners, or random vegetables unless you’re using a tested recipe for that exact combination. You can always season the beans when you open the jar.
Expect a softer texture
Home-canned green beans won’t taste like crisp steamed beans. They’ll be tender, more like old-fashioned simmered green beans. That texture is normal after pressure canning.
Season when serving
When you open a jar, drain some liquid if you like, then warm the beans with butter, pepper, garlic, onion, bacon, or a splash of vinegar. That’s the time to get creative.
A quart jar is a great size for family meals, soups, casseroles, and quick side dishes. Having a shelf full of them makes weeknight cooking easier in the best possible way.

Common mistakes to avoid
Pressure canning feels intimidating at first, but most problems come from a few easy-to-avoid mistakes.
Using a water bath canner
Green beans need pressure canning. A boiling water bath isn’t safe for plain green beans because they’re low acid.
Skipping the venting step
Letting steam vent for 10 minutes before pressurizing helps remove trapped air from the canner. Don’t skip it.
Counting time before reaching pressure
The 25-minute processing time starts only after the canner reaches the correct pressure.
Letting pressure drop
If the pressure falls below the required level, the timer needs to start over. Keep the heat adjusted so the pressure stays steady.
Opening the canner too soon
Let the pressure drop naturally. Forcing it down can cause liquid loss, seal failures, or broken jars.
Tightening bands after processing
If you tighten bands while jars cool, you can interfere with the seal. Leave them alone until the jars are fully cooled.
Storing jars with bands on
Once jars are sealed and cooled, remove the bands for storage. This helps you spot seal failures more easily and prevents rusted-on bands.
Pressure canning is part science and part rhythm. Once you’ve done a batch or two, the steps start to feel familiar.
A simple green bean canning day plan
If you’re canning several quarts, it helps to set up your kitchen before the beans are ready.
Start by washing jars and checking rims for chips. Set out lids, bands, salt, towels, a ladle, a funnel, and your jar lifter. Get the pressure canner on the stove with the rack inside.
Then prep the beans. Wash, trim, and cut them before you heat the jars or water. Once the beans are ready, heat your water and start filling jars.
Here’s a simple rhythm:
Wash and trim the green beans.
Warm the jars.
Add 1 teaspoon salt to each quart.
Pack the beans.
Add boiling water with 1 inch headspace.
Remove bubbles and wipe rims.
Add lids and bands.
Load the pressure canner.
Vent steam for 10 minutes.
10. Process quarts for 25 minutes at the correct pressure.
11. Let pressure drop naturally.
12. Cool jars 10 minutes in the canner then on the counter undisturbed for 12 to 24 hours.
13. Check seals, label, and store.
That’s the whole process in a neat little loop.
If you’re new to this, start with one canner load instead of trying to preserve every bean in the house at once. A smaller batch gives you room to learn without feeling rushed.
Pressure canning green beans with salt is one of those old-school kitchen skills that still makes sense. You take a pile of fresh beans, a little salt, clean jars, and careful pressure, then turn it all into shelf-stable food you’ll actually use.
Keep the basics steady: 1 teaspoon salt per quart jar, 25 minutes for quarts, and the correct pressure for your canner and altitude. Do that, and you’ll have jars of green beans ready for soups, suppers, and busy nights when opening home-canned food feels like a small gift from your past self.



Comments