Raspberry Jam Canning Recipe
- Marie Overton

- Jul 10, 2025
- 3 min read
Updated: Jul 11, 2025
If you love sweet spreads, nothing beats the satisfaction of homemade raspberry jam. Not only does it taste significantly better than store-bought options, but making it yourself lets you control the ingredients. Plus, canning your jam allows you to enjoy that fruity delight year-round. Let’s jump into how you can make, can, and savor raspberry jam like a pro!
Why Make Raspberry Jam?
Raspberries are a delightful summer fruit, but in colder months, they can be hard to find and often costly. When you make raspberry jam, you're preserving the fresh flavor, allowing you to enjoy a taste of summer anytime. Statistics show that homemade jams can save you around 50% compared to store-bought varieties, which often contain artificial additives. Still not convinced? Homemade raspberry jam makes a thoughtful gift. A simple jar of your creation can communicate care and effort in a way that store-bought products can’t.
Ingredients You Will Need
Before you start cooking, gather the ingredients. Here’s what you will need:
Fresh Raspberries: About 10 cups. Frozen raspberries work too, but ensure they are fully thawed before mashing. You will need 5 cups of mashed berries.
Granulated Sugar: 7 cups. This high sugar content helps preserve the jam.
Pectin: 6 tablespoons classic pectin.
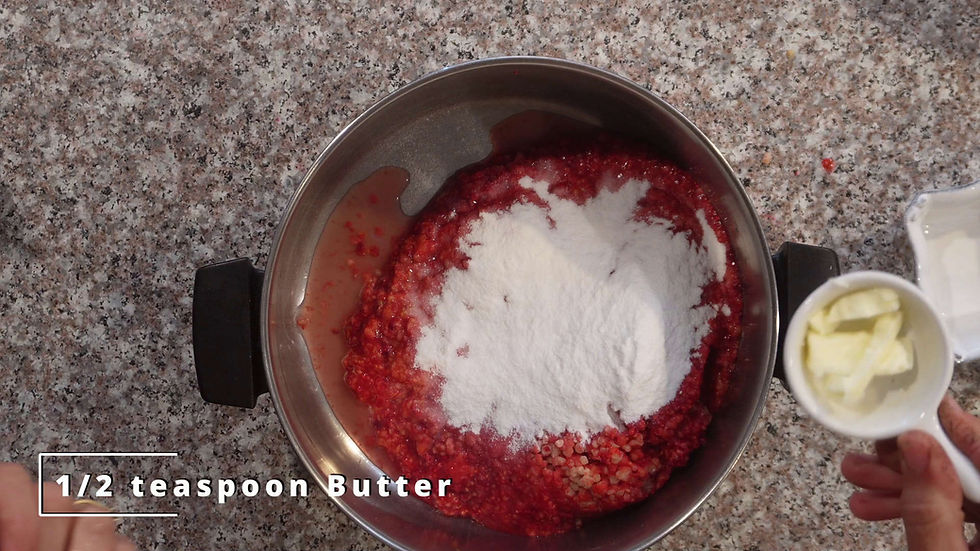
Butter: 1/2 teaspoon. (This is an option step but it reduces the foaming of the jam.)
Making the Jam
Follow these straightforward steps to create your delicious raspberry jam:

Mash Raspberries: In a large pot, mash the raspberries with a potato masher.

Add Pectin and butter: Mix pectin and butter in with the mashed berries.
Cook the Mixture: Heat the mixture over medium heat, bringing it to a boil while stirring frequently to prevent sticking.

Add Sugar: Once it boils, quickly add all the sugar. Stir until it completely dissolves, then return to a rolling boil. Boil for 1 minute.
Canning the Jam
Now for the fun part—canning your jam! Follow these steps to store it properly:

Fill the Jars: Using a ladle, carefully fill each half pint jar with hot jam, leaving a 1/4-inch headspace.
Seal the Jars: Clean the rims with a clean cloth to ensure a good seal. Place lids on top and screw rings on until they are finger-tight.
(For quality, American made Superb canning lids and jars follow this link and use the coupon code WP20 to get 20% off your purchase.)
Process the Jars: Place the jars in a boiling water canner, covering them with 1-2 inches of water. Process for 10 minutes at sea level. (Adjust the processing time if you are above 1000 feet.)
After processing, allow to cool in the water bath with the heat off and the lid removed for 5 minutes.

Cool and Store: Remove jars from the canner and let them cool on a heat resistant surface about 1-2 inches apart so they can cool a little faster. Allow them to sit undisturbed for 24 hours so that they can get a nice seal. you know they are sealed if the little "button" in the center of the lid is depressed down.
Place the sealed jars in a cool, dry area and use them within the next 3 years. After that, the nutritional value begins to decrease.
Ways to Enjoy Your Raspberry Jam

Once you’re ready to enjoy your homemade raspberry jam, the options are endless! Here are some delightful ways to use it:
Spread on Toast: A classic choice! Generously spread it on fresh bread or bagels for breakfast.
In Baking: Incorporate a spoonful into muffin batter or swirl it into cupcakes for a fruity surprise.
With Yogurt: Mix in a spoonful with your morning yogurt or oatmeal for a flavor boost.
Savory Pairing: Serve raspberry jam with cheese for a flavorful cheese platter, perfectly complementing brie and goat cheese.
A Final Word on Your Jam-Making Adventure
In the world of preserves, raspberry jam holds a special spot. It’s a labor of love that captures the sweet essence of summer. With a bit of patience, you can enjoy it anytime you crave. From breakfast spreads to sweet treats and everything in between, your homemade jam will surely impress.


Comments