Easy Steps to Sew Your Own Hanging Kitchen Towel
- Marie Overton

- Oct 28, 2025
- 4 min read
Sewing a hanging kitchen towel is not just an enjoyable hobby; it’s a practical way to brighten up your kitchen. You can have your towels close at hand while keeping your space organized and stylish. In this guide, we’ll take you through easy steps to create your very own hanging kitchen towel. No matter your sewing experience, this project is perfect for everyone.
Materials Needed
Before you dive into the fun, gather the following materials to ensure a smooth sewing experience:

Half a kitchen towel: Choose a thicker towel for better absorption. For example, towels with a weight of 400 GSM (grams per square meter) are excellent.

Fabric for the hanging loop: Cotton or linen are great choices. Choose a piece measuring 15 by 7 inches.
Fabric for the locking loop: Choose a piece measuring 4 by 7 1/2 inches
Matching thread
Having all your materials ready will create a smoother and more enjoyable sewing process.
Choosing Your Towel and Fabric
Select a kitchen towel that complements your kitchen décor. If you have a neutral-colored kitchen, a vibrant patterned towel can brighten up the room. For the hanging loop, aim for a fabric that contrasts well with the towel. For instance, a blue towel paired with a white polka dot loop can create a stylish combination.
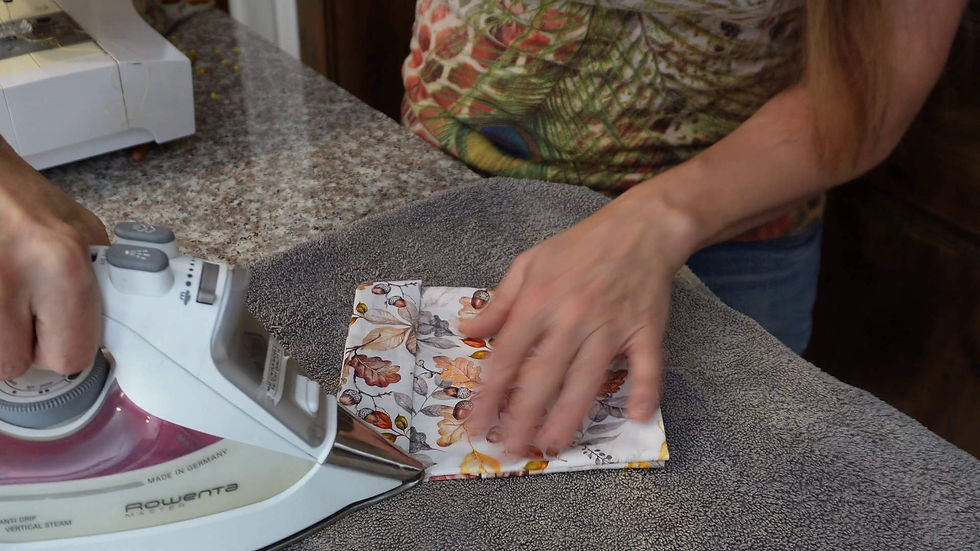
Preparing the Fabric

Once you’ve cut your fabric, fold over a 1/2 inch section of the top and bottom of the larger piece and iron it.

Then fold it in half with the right sides facing each other. Press the fold lightly with an iron to create a mild crease.

Next, fold the smaller piece in half lengthwise with the right sides facing each other. Sew along the pinned side with a 1/4 inch seam allowance.

Press the seam open. Turn it right side out and press it flat with the seam on the back side.

Then, pin the smaller piece against the light crease that you put into the larger fabric earlier. If you have a directional fabric, make sure it is upside down compared to the larger piece. Because the loop is slightly long it will bubble up a little. This will provide room for the towel.

Fold the large piece in half with the right sides facing each other. Pin the sides.
Next, sew along the long edge with a 3/8 inch seam allowance, remembering to leave the ends open. This action forms a pocket that you can turn inside out.
Turning the Fabric
To turn your fabric pocket right side out, you can use a chopstick or a special turning tool. After it is turned, press it with the iron to flatten the fabric. This step ensures a tidy finish, making your loop look sharp and professional.
Attaching the Loop to the Towel

To attach the loop to your kitchen towel, first, fold the towel in half to locate its center. Position the fabric loop on the top edge of the towel with the loop facing downward and ensure it’s centered. Fold over the sides to fit. Secure it in place with pins.
Sewing the Loop to the Towel
Using your sewing machine, stitch across the bottom edge of the top to affix the towel. Don’t forget to backstitch at both the start and end of your seam, reinforcing it for durability. This adjustment makes sure the top can withstand regular use without coming undone.
Finishing Touches
Once your loop is secured, consider adding some embellishments. A decorative stitch along the edges or a small patch can personalize your towel beautifully. You might choose a bright thread color to contrast with the towel, adding flair and creativity.
Final Press
After you’re pleased with your work, give the entire towel a final press with the iron. This action will smooth out any wrinkles and impart a polished look, making your hanging kitchen towel picture-perfect.

Displaying Your Hanging Kitchen Towel
Your hanging kitchen towel is now ready to be shown off! Hang it on your oven handle or a nearby hook for quick access. Not only will it serve a functional purpose, but it will also beautify your kitchen environment.
(If you have questions on how to hang the towel, watch the end of my video above.)
Tips for Success
Select Quality Materials: Using high-quality towels and fabric ensures longevity and aesthetic appeal. A good kitchen towel can last between 3-5 years with proper care.
Experiment with Sizes: Feel free to adjust the loop or towel dimensions. If your kitchen is less traditional, a unique shape can add charm.
Practice Makes Perfect: If you’re a novice, practice on scrap fabric. This will boost your confidence for the final project.
Wrapping Up
Sewing your own hanging kitchen towel is a straightforward and gratifying project that enhances both function and style in your kitchen. With a few materials and some basic sewing skills, you can create a beautiful and practical item that truly represents your taste. So gather your supplies, follow these clear steps, and relish the joy of making something special with your hands!


Comments