How to Sew Unpaper Towels
- Marie Overton

- Jul 30, 2021
- 3 min read
Updated: Feb 24
I rarely have paper towels at my house. It’s been a few years since I last purchased them. All we use are my homemade, adorable, unpaper towels. Not only are my custom made-to-match-my-kitchen unpaper towels far cuter than ordinary paper towels they are also more environmentally friendly.
HOW TO SEW UNPAPER TOWELS
This is a perfect BEGINNERS pattern and tutorial. Anyone can make these, they are just that simple.
Materials:
The towels are made using two layers of 100% Cotton Flannel. Or, if you prefer you can use one layer of 100% cotton Flannel and one layer of any cloth diaper or more absorbent fabric like Birdseye, Terry Cloth, or Cotton Weave/Waffle.
The color and print of the fabric is totally up to you. I generally use a pretty pattern on the top and a solid color on the bottom. I love tribal prints … and floral … and anything aniimal … and farm related … okay, okay, I love ALL FABRIC! If you love color and fun prints look for those. Prefer floral, that’s easy to find. Want animals, there’s always cute animal prints at my fabric store. Just head to the fabric store and browse the aisles of endless fabric goodies.
The amount of fabric you will need depends on what size you want your towels to be, and how many you make. On this tutorial I cut the fabric for my towels at 12″ square and when they are sewn they are 11″ squares. I love this size!
In addition to your fabric you will also need some standard sewing supplies: cutting mats and rulers or a hard surface and a tape measure, coordinating or contrasting thread and scissors, a sewing machine and/or serger, (optional) and perhaps some pins and an iron.
Preparing the Fabric to Make Unpaper Towels
Cut two squares of fabric 12″ square from coordinating or contrasting colors.
making Unpaper Towels

Pair up two squares of fabric, right sides together. Remember, if your fabrics have tops and bottoms make sure the top and bottom face the right way. (That’s why I like one fabric plain, then this doesn’t matter). Ideally, they'll line up perfectly. If not, no big deal, you can trim them, later! Or leave it since it will be on the inside anyway.
You need to leave 2-3 inches unsewn so that you can turn the towel inside out. I use the width of my hand to measure the opening.

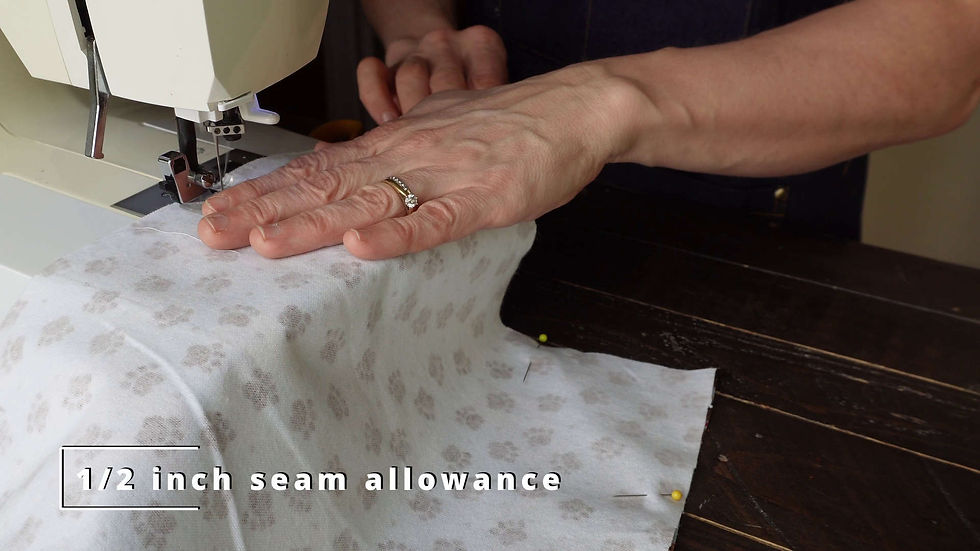
Once you've sewn around the edges leaving a 1/2″ seam allowance, except for the turning opening, trim the corners closer to the seam so it doesn't bunch up.

Turn your towels inside right and make sure your corners are “picked out”.

Iron the sides flat including your turning opening so it lays perfectly before you top stitch.

Now it’s time to top stitch. The top stitching is how you'll close up the turning hole that's still open. It also adds a beautiful finishing touch. I top-stitched around the towel with a 1/8 inch seam allowance. The key here is to get as close as you can.
Optional Step:

Finally, I sewed a large X across my towels from corner to corner. This is important if you did not pre-wash your fabric, less so if you did. It is an optional step, but I admit I always do it because then my towels never tug or become misshaped in the wash.

Then, just go back and trim all of your loose thread off.

Note: Some people worry that their towels will become stained and ugly. I assure you they hold up very well and are no more stained that the average kitchen towel. If mine get to the yucky stage I do what I would with any old towel, I add it to the truck cleaning bucket. Once I clean the truck with it 4 or 5 times it will be time to permanently retire it. You can throw them away or use them as small animal bedding in a gerbil or rabbit cage. Some organic fabrics can even be composted.


Love This Idea ! Thanks :-)