How to Can Plum Juice at Home
- Marie Overton

- Sep 27, 2021
- 3 min read
Updated: Mar 16
Plum juice is a family favorite so I am glad we have 5 plum trees and I know how to juice and can plum juice at home. Making plum juice is one of the easiest ways to preserve our harvest. Plum Juice is a little thick and tart so I like to make it into a “punch” by mixing it with lemon-lime soda. It can also be made into a lovely jelly.

Plum Juice
Prepare the Juicer and Jars
Begin by preparing for juicing. Fill your boiling water bath canner so it will cover 4 quart-sized or 2 half-gallon jars. Place the water bath on medium heat to warm up. Fill the bottom of your juicer with water and start heating the water on medium heat as well.

If you need a more in-depth tutorial on how to use a steam juicer, visit my tutorial.
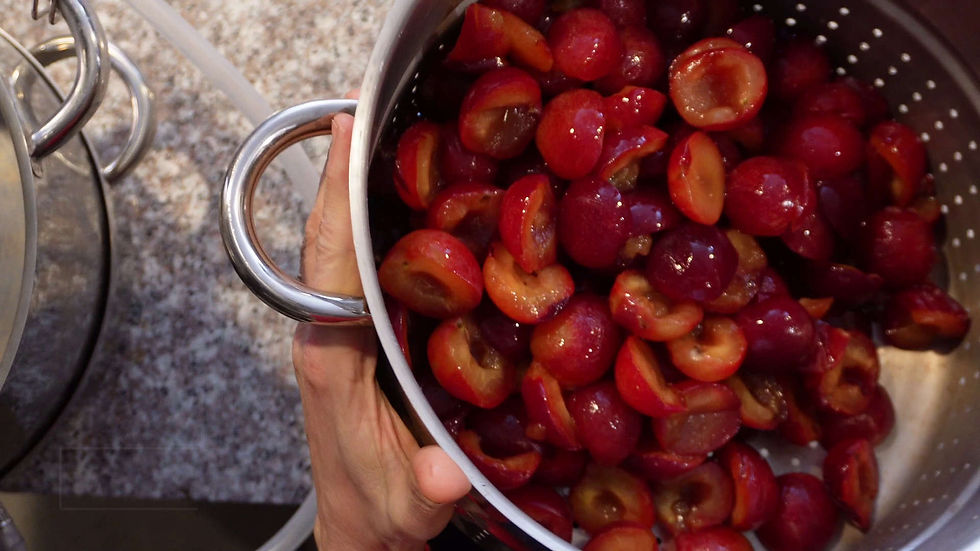
Prepare the Plums for Juicing
Since I will be using the leftover pulp to make plum butter I will de-stem and pit 6 pounds of plums. If you are only planning on using the juice you could skip this step. I am preparing 6 pounds because that is the amount needed for the butter recipe. If I was not making plum butter I would fill the top basket of the juicer with whole plums.
Place the plums in the top basket of the juicer and turn the heat up to high. Continue to check the water level on the bottom as you do not want to burn your pan. Over the course of 30 minutes to an hour (or so), depending on the ripeness of your fruit, the juice will collect in the middle basin of the juicer. Be careful not to let the middle juice receptacle spill over into the water below.
I like to use a stool as my working surface as it is at a good level from the level of the stove to allow me to use gravity to help drain the juice into my jars. Place something like a wood cutting board down to protect the stool, both from the heat and sticky messes. I like to have an additional jar available to catch any drips from the hose as sometimes the clamp allows a little to leak.
Fill and Process Mason Jars of Plum Juice

After the juice has collected in the middle portion of the steamer juicer I drain the juice into a pot. I place it on the stove and heat it to 190 degrees F for 5 minutes. It shouldn't take long as it is already quite hot. Using a jar funnel, I fill my hot quart jars with hot juice. Plums can be quite tart so if you like sweet juice you can put about an inch of juice in the bottom and then add 1/4 cup of sugar (optional) to each jar before filling them to a 1/4 inch headspace. If you are planning on using the juice for another project, as I did (plum jelly), then you want to leave it without the sugar.

After your jars are filled, place the lids and rings on fingertip tight. (For quality, American made Superb canning lids and jars follow this link and use the coupon code WP20 to get 20% off your purchase.)
Now it is time to place them into the boiling water bath canner. Process for 15 minutes if at sea level. (Adjust the processing time if you are above 1000 feet.) This processing time allows you to skip the jar sterilization that would otherwise be needed.

Once your plum juice has completed processing, turn off the heat and allow them to cool for 5 minutes. At the end of the cooling time, carefully remove the jars from the water bath with a jar lifter and place them on a heat resistant surface about 1-2 inches apart. Allow them to cool completely for 24 hours.

After they have sealed fully remove the rings and wash the threads and the rest of the jar well.
If your jar did not seal, then place it in the refrigerator and use it immediately. Store the sealed jars in a cool dry place to enjoy for the next 1-3 years. After three years the nutritional value of canned food diminishes. The quality is best in the first year.

If you have any questions about how altitude affects processing time, how to use a boiling waterbath, or how to use a steamer juicer take a look at my canning basics videos.
Next, I am going to use the leftover plum pulp to make Plum Butter and the juice to make Plum Jelly.


Comments