



DIY Lumber Potting Bench

A good potting bench doesn’t need to be fancy, but it does need to be sturdy, useful, and cute enough that you actually want it sitting by the garden. This build checks all three boxes. It’s made mostly from 2x4s, has open storage underneath for soil bags and pots, and gets its charm from an antique window frame on the back with a metal decoration mounted above it.
Think of this as a practical garden workbench with a little farmhouse personality. The 2x4s give it weight and strength, the lower shelf keeps supplies off the ground, and the old window frame makes the whole thing feel collected instead of brand new.
The plan below makes a bench that’s about 55 inches wide, 24 inches deep, 32 inches high at the work surface, and roughly 75 inches tall overall, depending on your window frame and top decoration. You can easily adjust the size if your antique window is wider, narrower, taller, or just wonderfully weird in the way old windows usually are.
Plan the size around your antique window frame
The antique window frame is the piece that gives this bench its character, so start there before cutting lumber. Measure your window frame first, then build the bench around it.

For a balanced look, the window usually looks best when it’s:
A little narrower than the bench
Centered on the back
Raised slightly above the work surface
Secured to tall back posts, not just balanced on the tabletop
If your bench is 48 inches wide, a window frame between 30 and 42 inches wide usually looks great. If your window is wider than that, you can either make the bench wider or let the window nearly span the full back.
Before using the window, check it closely.
Look for loose glass, peeling paint, weak corners, and rusty hardware. Old painted windows can have lead paint, especially if they were made before 1978. If the paint is chipping, wear a mask, don’t sand it aggressively, and seal it with a clear outdoor-safe topcoat. If the glass is cracked or wobbly, either remove it or replace it with acrylic.
The antique pieces are pretty, but the bench still has to be safe. Secure the window and metal decor like they’ll be hit by wind, rain, and the occasional bumped shovel.
For the metal decoration on top, a lightweight piece works best. A metal scroll, garden arch accent, salvaged iron panel, decorative tin piece, or old gate topper can all look beautiful. Just make sure it has solid spots where you can fasten it to wood.
Gather your lumber, hardware, and tools
This bench is built with standard lumber, which keeps things simple. You don’t need fancy joinery. Strong screws, square cuts, and good bracing will do the job.
Here’s a cut list for a bench about 55 inches wide by 24 inches deep.


The exact number of boards depends on how many boards you use on the lower shelf and how much bracing your window needs.
You’ll also need:
Exterior-grade wood screws, 2 1/2 inches
Exterior-grade wood screws, 3 inches
Corner brackets or mending plates, optional but helpful
Outdoor wood glue, optional
Sandpaper or sanding block
Exterior stain, paint, or sealer
Drill and bits
Saw
Tape measure
Speed square
Clamps
Level
Safety glasses
Work gloves
Cedar and pressure-treated lumber both work outside, but regular construction 2x4s can also work if the bench sits in a covered spot and you seal it well. If you use pressure-treated lumber, let it dry before painting or staining.
Build the potting bench frame and lower storage shelf
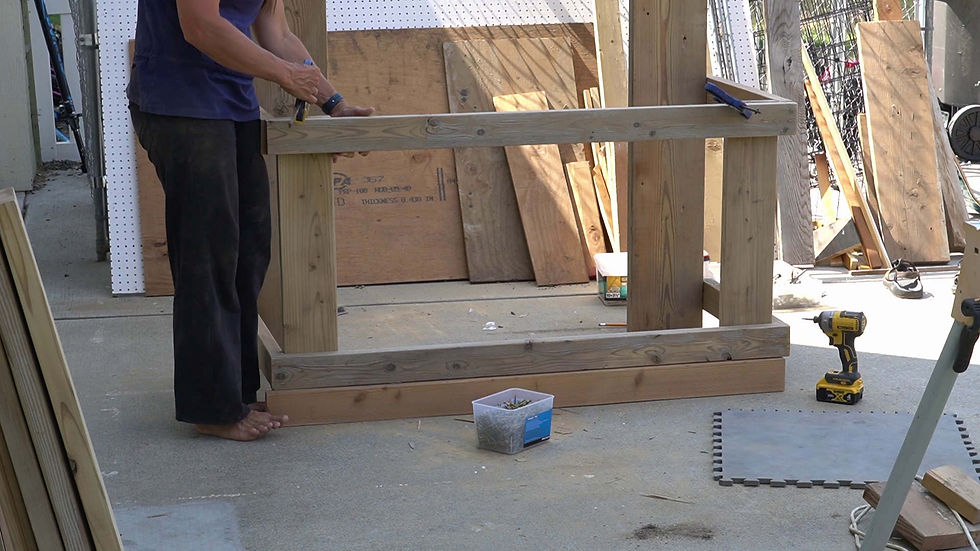
Start with the basic bench frame. This is the part that carries the weight, so take your time here. A square frame makes every later step easier.
Lay out the two tall back legs and two shorter front legs. The tall legs create the back supports for the antique window frame and top metal decoration. The shorter front legs stop at the work surface.
For the top frame, attach one 54 3/4-inch 2x4 across the front legs and one across the back legs at about 30 1/2 inches from the ground. Once the tabletop boards go on, the working height will land close to 32 inches. That’s comfortable for most potting work because you won’t have to bend over as much.
Then attach the side rails between the front and back legs on each side. Use 3-inch exterior screws and check for square as you go.
A simple way to check square is to measure diagonally from corner to corner. If both diagonal measurements match, the frame is square. If not, gently push the frame until it lines up.
Now build the lower storage shelf frame. Place it around 3 1/2 inches off the ground. Higher looks lighter and makes sweeping underneath easier. Lower gives you more room above for tall soil bags, buckets, and watering cans.
Use the other two 55-inch rails for the front and back of the shelf frame, then add the two 21-inch side rails. Screw everything into the legs.

At this point, you’ll have a sturdy rectangular bench frame with tall posts in the back. It may still wiggle a bit from side to side, and that’s normal before the tabletop, shelf boards, and back supports are added.
Add the work surface and under-bench storage
The work surface is made from 2x4s laid flat across the top frame. For a 24-inch-deep bench, seven 55-inch boards will give you a full, chunky surface with a slight overhang.
I usuall do the bottom shelf first just so I have a little more headspace but if your frame is lose this will tighten it up.

Lay the boards across the top from front to back. You could have them close together or eave a tiny gap between them so water and loose soil can fall through. A paint stir stick or scrap piece of cardboard works well as a spacer.
Before screwing them down, arrange the boards so the best-looking edges face up. If one board is crowned, place the crown facing up rather than down. Wood moves over time, but that small choice helps the surface stay nicer.

Screw each tabletop board into the front and back rails. Use two screws at each rail per board if you want a firm worktop. Sanding now is easier than when it is all put together.

For the lower shelf, you have a choice.
If you want a solid shelf, use boards just like the top. This is great for storing small pots, hand tools, seed trays, and baskets.
If you mostly store larger items, use five 48-inch boards and leave wider gaps. That gives dirt and water a place to drain and keeps the bench from feeling too heavy.
Good things to store underneath include:
Bags of potting mix
Terra-cotta pots
Plastic nursery pots
Watering cans
Garden kneelers
Baskets for gloves and hand tools
Seed-starting trays
Small buckets of soil amendments
If you want even more storage, screw a few hooks into the side of the bench for trowels, scissors, plant tags, or a small hand broom. A simple rail on one side also works well for hanging spray bottles or twine.
This lower area is what makes the bench more than just a pretty work surface. A DIY potting bench with under storage antique window frame and metal top decor can still be hardworking, not just decorative.

You can also add a middle shelf to one side as I did.

Attach the antique window frame and metal top decoration
Now comes the fun part. The back is where the project starts to look like something special.
Hold the antique window frame against the tall back posts and decide where it looks best. Most windows look good when the bottom edge sits a few inches above the tabletop. That leaves room to brush soil off the back of the work surface and keeps the window from constantly sitting in wet dirt.
Once you like the placement, mark it with a pencil.

Add two rails across the back posts. One should sit behind the lower part of the window frame, and the other should sit behind the upper part. These rails give you solid wood to screw into. They also stop the window from relying only on the side posts for support.

Fasten the window frame to the back rails with screws through the wooden window frame. If you don’t want visible screws on the front, attach small brackets from the back side instead.
If the window is fragile, use washers with your screws so the screw heads don’t bite too far into the old wood. Don’t overtighten. Old window frames can split if you crank down too hard.

Next, attach the top rail for the metal decoration. Place a 48-inch 2x4 across the very top of the tall back posts, or just above the window if your posts are extra tall. This rail gives you a strong mounting point for the metal piece.
Center the metal decoration above the window. Step back and check the look before drilling. This is one of those spots where one inch left or right can make the whole thing feel off.
Attach the metal decor using screws, bolts, or metal straps, depending on the piece. If it’s a salvaged gate topper or an iron scroll, small U-brackets or pipe straps may hold it better than screws alone. If it’s a lightweight metal wall decoration, exterior screws with washers usually work fine.
For wind resistance, add at least two solid attachment points. Four is better.
If the metal has rust, you can either embrace it or seal it. Clear spray sealer helps slow down more rust while keeping that old garden look. If the rust is flaky, brush off the loose bits first.
Finish it so it lasts outside

Before painting or staining, sand the bench. You don’t need to make it furniture-smooth, but you do want to knock down rough edges and splinters. Pay extra attention to the front edge of the work surface, since that’s where your hands and arms will touch most.
Round over sharp corners with sandpaper. It makes the bench feel more finished and less like a stack of framing lumber.
For the finish, you’ve got a few good options.
Finish | Best for | Look |
Exterior paint | Maximum color and coverage | Cottage, farmhouse, bold garden style |
Exterior stain | Showing the wood grain | Rustic, natural, warm |
Clear outdoor sealer | Keeping raw wood tones | Simple and understated |
Whitewash or dry-brush paint | Aging new lumber | Salvaged, vintage, softened |
If the window frame already has old paint, you can paint the bench in a color that complements it. Soft green, warm white, black, weathered gray, and muted blue all look great in a garden.

Seal the bottom of the legs well, since they’re closest to wet ground. If the bench will sit directly on soil or grass, set the legs on pavers, bricks, or concrete blocks. That one small step helps the wood last much longer.
You can also add a few useful extras once the finish dries:
A galvanized tub or tray on top for mixing soil
Hooks along the side for tools
A small basket attached to the back for plant labels
A towel bar for hanging gloves
A bottle opener if the bench lives near a patio
A small solar light clipped near the metal decoration
Keep the additions simple. The antique window and metal top piece already bring plenty of charm, so the extras should make the bench easier to use.
Make it your own without overcomplicating it
The best part of this project is how flexible it is. If your window is narrow, add side shelves or hanging hooks to fill the back. If your metal decoration is tall, extend the back posts a little higher. If you want more storage, add a second shelf underneath or build a crate that slides into the open space.
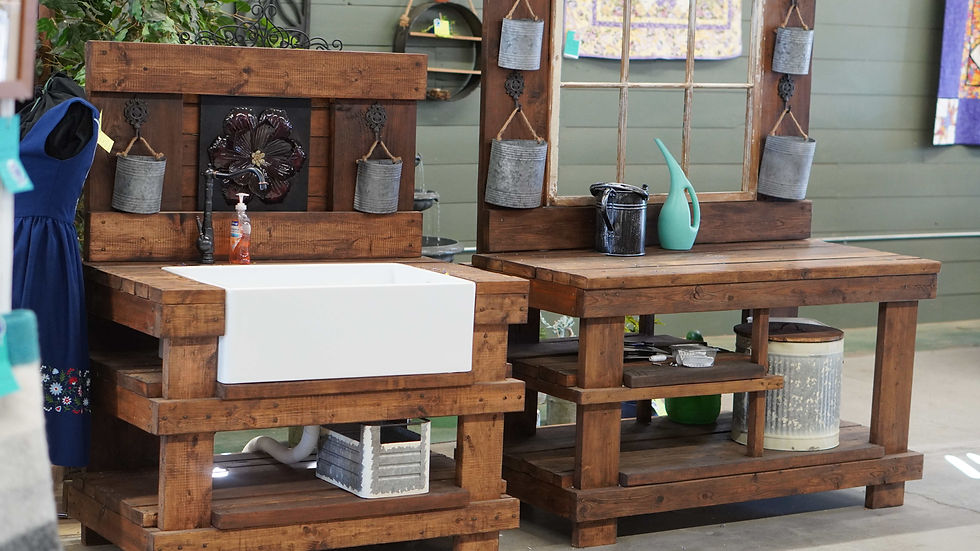
You can also add a back ledge below the window. A single 2x4 mounted flat behind the work surface makes a handy spot for seed packets, small pots, or a row of herbs.
If you’re using mismatched salvaged pieces, don’t fight the imperfections too much. A slightly worn window frame and aged metal topper are exactly what make the bench feel collected over time. The clean structure gives it strength, while the vintage details give it soul.

When you’re done, you should have a sturdy potting bench with a wide work surface, practical storage underneath, a beautiful antique window frame on the back, and a metal decoration crowning the top. Set it near your garden, add a few pots and tools, and it’ll look like it’s been there for years.





Comments