


How to Refurbish a Dated Sideboard

Some furniture pieces don’t look promising at first. This sideboard was one of them.
It came from my sister-in-law, and when I first saw it, I wasn’t sure I wanted to take it on. It had that very dated look that makes you question whether paint can really save it. Some areas were sun bleached, the finish looked tired, and the whole piece felt neglected.
But the bones were good.
That’s usually what makes me pause before passing on a piece. If the shape is interesting, the storage is useful, and the details have potential, it’s worth looking past the old finish. I’m so glad I did with this one, because it has become one of my favorite pieces in our dining room.
Now it’s the perfect spot for baked goods, serving pieces, and all the little extras that seem to gather in a dining space. The kids know they can always check there for something good to eat, which honestly makes me love it even more.
If you have an old sideboard, buffet, or cabinet sitting around, this project is a great reminder that you don’t always need to replace furniture. Sometimes a little paint, sanding, wax, and patience can turn a dated piece into something charming and useful again.
Start by looking at the piece with fresh eyes
Before you grab a paintbrush, take a few minutes to really look at the furniture. Not just at what you don’t like, but at what could stand out with a new finish.

On this sideboard, the color and finish were the biggest problems. The sun bleaching made parts of it look uneven, and the overall style felt heavy and worn. But there were several things I liked right away:
The shape had character
The doors gave it practical storage
The trim and carved details could look beautiful with distressing
The faux marble top added a little contrast
The antique knobs actually worked with the piece
That last one surprised me. Most of the time, I replace hardware when I refinish furniture. New knobs can completely change the feel of a piece. But in this case, the original antique knobs had the right look once the sideboard was painted. They added back a little age and charm.
That’s a good thing to keep in mind. You don’t have to decide every detail before you start. Sometimes the piece tells you what it needs as you go.
It also helps to ask yourself where the furniture will live when it’s finished. I knew this sideboard could work in the dining room, so I wanted it to feel warm, a little worn, and a little rustic. I didn’t want a perfect showroom finish. I wanted something that could hold cookies, breads, serving dishes, and whatever else family life brings.
That made the distressed chalk paint finish an easy choice.
Remove the doors and hardware before painting
This step is easy to skip, but I promise it’s worth doing.
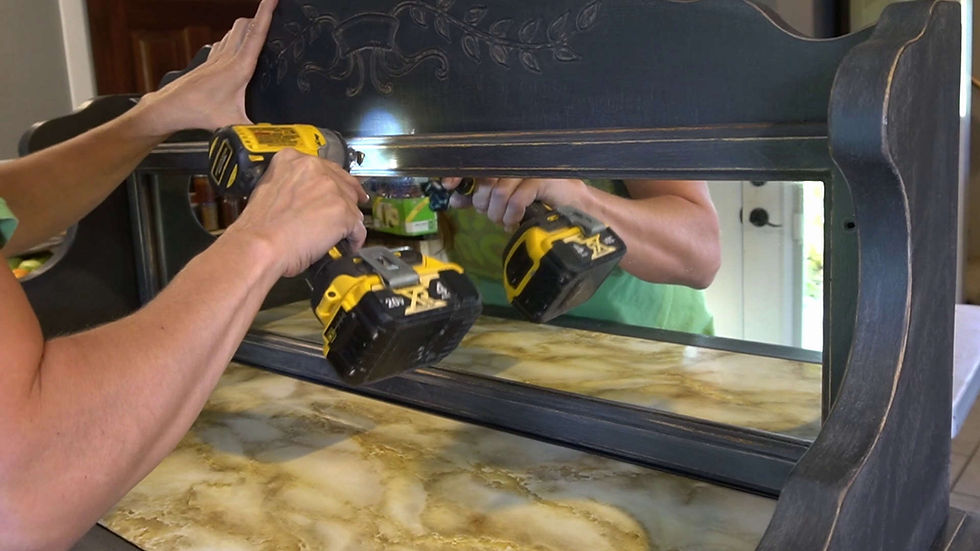
I started by removing all the doors and hardware. That meant taking off the hinges, knobs, and anything else that would get in the way while painting.
It can be tempting to leave doors attached, especially if you’re excited to get started. I get it. Removing hardware feels like one more chore before the fun part begins. But if you leave everything on, you’re almost guaranteed to get paint on hinges, knobs, or edges where it doesn’t belong.
Taking everything apart gives you more control. It’s easier to paint smooth surfaces, reach corners, and avoid drips. It also makes the final piece look cleaner, even if you’re going for a distressed finish.
Here’s what helped me keep things organized:
Put screws and small hardware pieces in a bowl or plastic bag
Keep each hinge set together if they’re slightly different
Take a quick photo before removing the doors
Label pieces with painter’s tape if needed
That photo can be a lifesaver when it’s time to reassemble everything. Older furniture can have little quirks, and sometimes one door fits better on one side than the other.
Once the doors and hardware were out of the way, I had a much easier time working on the body of the sideboard. I could see all the areas that needed attention, and I didn’t have to paint around knobs or worry about catching a hinge with the brush.
If you’re refurbishing a piece with drawers, remove those too. Paint the fronts separately and keep the inside edges neat. It makes the whole project feel less awkward.
Prep the surface so the paint has something to grip
Chalk paint is one of my favorite paints for furniture because it can go over a previous finish without the same level of prep some paints require. That said, I still like to do a light sanding first.
For this sideboard, I lightly sanded the surface to help the paint adhere better. I wasn’t trying to strip the whole piece down to bare wood. The goal was simply to scuff up the existing finish so the paint had a better surface to grab onto.
A light sanding also helps smooth out little rough spots, old finish imperfections, and areas that may have been damaged by sun exposure.
For this part, you don’t need to overthink it. A sanding sponge or fine-grit sandpaper works well for most furniture pieces. Move with the grain where you can, and pay attention to edges, corners, and detailed areas.
After sanding, wipe everything down really well. Dust is sneaky. If you leave sanding dust behind, it can mix into your paint and leave a gritty texture. Use a clean cloth, tack cloth, or slightly damp rag, then let the piece dry before painting.
My sideboard had a faux marble top, so I had to work around that. It wasn’t too difficult, but it did make me slow down a bit near the top edge. If you’re worried about getting paint on a surface you want to keep, cover it and tape it off.
Painter’s tape and paper or plastic sheeting can save you from a lot of cleanup later.
I didn’t mind working carefully around the faux marble, but taping is a smart choice if your hand isn’t steady or if the top has a finish that would be hard to clean. Paint has a way of ending up exactly where you don’t want it when you’re almost done.
Use chalk paint for an easy furniture refresh
Once the sideboard was cleaned and lightly sanded, I painted it with chalk paint.

Chalk paint is a great choice for a project like this because it has a soft, matte look and usually covers well. It also suits older furniture beautifully, especially if you plan to distress the edges. The finish feels relaxed and lived-in, which was exactly what I wanted for my dining room.
I painted the main body first, then worked on the doors separately. This made the process easier and helped prevent missed spots around the door frames.
When painting furniture, thin and even coats are better than one thick coat. A heavy coat can leave brush marks, drips, or a gummy finish that takes forever to dry. A thinner coat dries more evenly and gives you more control.
Let the paint dry well between coats. Drying time can vary depending on the paint, the weather, and how thickly you apply it. If a coat still feels cool, tacky, or soft, give it more time.
I know waiting isn’t the most exciting part. But rushing paint is one of the easiest ways to ruin a finish. If you sand or wax before the paint is ready, the surface can peel, smear, or look uneven.
For detailed areas, use a smaller brush so you can get into trim, grooves, and corners. Don’t worry if the first coat looks a little uneven. That’s normal, especially when you’re covering a darker or glossy finish.
The second coat usually brings everything together.
As I painted, the sideboard started to feel completely different. The dated finish disappeared, and the pretty details became more noticeable. That’s one of my favorite parts of painting older furniture. The features that once felt too heavy can suddenly become the thing that makes the piece special.
Distress the edges by hand for a softer aged look
After the paint had dried sufficiently, I went back and sanded the edges to distress the piece.

This step made a huge difference.
Distressing brings out the shape of the furniture. It highlights trim, corners, raised details, and any decorative designs that might disappear under a solid coat of paint. It also gives the piece a softer, aged look that feels natural instead of brand new.
I sanded by hand because I wanted more control. A power sander can be helpful on large flat surfaces, but it can remove paint very quickly. For distressing, hand sanding lets you decide exactly how much wear you want.
I focused on the areas that would naturally wear over time:
Corners
Door edges
Raised trim
Around carved details
Drawer or cabinet edges
Spots where hands would touch often
The key is to go slowly. Sand a little, step back, and look at the whole piece. It’s much easier to remove more paint than to put it back.
If you want a subtle distressed look, use a light hand. If you want a more rustic style, you can sand heavier in certain areas. I preferred a balanced look where the details stood out, but the piece still felt polished enough for the dining room.
This is also where the original design of the sideboard really started to shine. The sanding brought attention to the details and gave the whole piece more depth. Instead of looking flat, it had movement and character.
Once the distressing looked right, I wiped everything down again to remove all the sanding debris. This is another step you don’t want to rush. Any leftover dust can get trapped under the wax and make the finish feel rough.
Use a soft cloth and check the corners carefully. Dust loves to hide in carved details and along trim.
Seal the paint with finishing wax and buff it smooth
After the piece was clean, I sealed it with finishing wax.

Wax is a lovely topcoat for chalk paint because it keeps that soft, matte look while adding protection. It also gives the surface a smooth feel once it’s buffed.
I applied the wax over the painted and distressed areas, working it into the finish. You don’t need a huge amount. A thin, even layer is better than a thick one. Too much wax can feel sticky or take longer to cure.
After waxing, I let the sideboard sit for 24 hours. Then I went back with a cloth and buffed it.
Buffing is what makes the finish feel finished. It smooths the wax, removes excess product, and gives the piece a soft sheen. You’re not trying to make it shiny like glass. You’re just bringing the surface to life.
Use a clean, lint-free cloth and rub in gentle circles or long strokes. As you buff, you’ll feel the surface change. It becomes smoother and less tacky.

If the piece will get heavy use, especially in a dining room, sealing matters. Sideboards often hold serving dishes, food, trays, baskets, and decor. A protective finish makes the furniture easier to wipe down and helps the paint last longer.
Just remember that wax can take time to fully cure. Be gentle with the piece for the first several days. Avoid setting anything damp, hot, or heavy on it right away.
Reattach the hardware and bring the sideboard back to life
Once the finish was dry and buffed, I put the sideboard back together.

This is always the most satisfying part. The doors go back on, the knobs return, and suddenly it looks like a real piece of furniture again instead of a project spread across the room.
I reattached the hinges and knobs, then checked that the doors opened and closed properly. With older furniture, you may need to adjust a hinge or tighten a screw to get everything sitting right.

As I mentioned earlier, I often replace hardware on painted furniture. New knobs can be beautiful, and they’re a simple way to change the entire style of a piece. But these antique knobs were too good to remove.
Once the sideboard had its new painted finish, the knobs looked intentional. They added age in the best way.
That’s one of the best lessons from this project. Don’t assume everything old needs to go. Sometimes the original details are what make the final result feel unique.
When the sideboard was fully assembled, I moved it into the dining room. It instantly looked like it belonged there. The painted finish was perfect in the room, the distressed edges added warmth, and the faux marble top still gave it a nice contrast.

Now it’s one of those pieces we use all the time. I put baked goods there, especially when I’ve made cookies, muffins, bread, or anything the kids might want to grab. It has become a natural gathering spot in the room.
And honestly, that’s what makes a refurbished piece feel successful. It doesn’t just look better. It becomes part of daily life.
A few tips before you start your own sideboard makeover
If you’re thinking about painting a dated sideboard, buffet, or cabinet, here are a few things I’d keep in mind.
Don’t skip taking the hardware off. It may feel annoying in the moment, but it makes painting so much easier and cleaner.
Sand lightly before painting. Even with chalk paint, a quick sanding helps the finish stick better and look smoother.
Protect any surface you don’t want painted. If your piece has a stone, faux marble, wood, or laminate top you want to keep, tape it off before you start.
Let the paint dry fully. Rushing between coats can lead to peeling, smudging, or uneven distressing.
Distress slowly. Hand sanding gives you more control and keeps the finish from looking too harsh.
Use wax or another protective topcoat. Painted furniture needs protection, especially if it will be used in a busy room.
Keep the original hardware if it works. Sometimes old knobs or pulls look completely different once the paint color changes.
Refurbishing furniture doesn’t have to be complicated. You don’t need a huge workshop or fancy tools. You just need a plan, a little patience, and a willingness to see past the current finish.

This sideboard started as a dated, sun-bleached piece I almost didn’t bother with. Now it’s a charming dining room piece that holds baked goods, adds storage, and makes the room feel more personal.
That’s the beauty of redoing old furniture. You get something useful, something pretty, and something with a story. And every time someone reaches for a treat from that sideboard, I’m reminded how glad I am that I gave it a second chance.



Comments