



Optimizing Your Garden Setup with the Mittleider Gardening Method

A garden can look perfect on paper and still fight you all season if the setup is off. Uneven beds hold water in one corner and dry out in another. Wide beds make harvesting awkward. Weak trellises collapse right when the tomatoes finally get heavy.
That’s why the Mittleider method starts before you plant anything. The real win is the structure: level beds, clear paths, controlled soil, steady feeding, and strong vertical support. Once those pieces are in place, the day-to-day work gets a lot easier.
If you’re building from scratch, here’s how to set up a productive, tidy, easy-to-manage Mittleider Garden, from leveling the site to adding raised beds, custom soil, trellis posts, and wire.
Start with a level site that drains well
Leveling doesn’t sound exciting, but it’s one of the biggest differences between a garden that behaves and one that constantly needs attention.
The Mittleider method uses narrow, organized growing areas. Whether you choose raised boxes or soil beds, each bed should sit level from end to end and side to side. That helps water and nutrients spread evenly instead of running downhill.
Start by choosing a spot with:
At least six hours of direct sun
Good air flow
Easy access to water
Room for paths between beds
No major low spots that stay soggy after rain
If your yard has a slight slope, don’t panic. You don’t need a perfectly flat property. You need each bed to be level. Think of it like building small terraces.
A simple setup uses stakes, string, and a line level. Set stakes at the corners of each planned bed, pull string tight, then adjust your soil grade or bed frame until the top line reads level. Take your time here. Every minute spent leveling saves you frustration later.
For a small garden, you can level by hand with a shovel, rake, and tamper. For a larger setup, you may want to remove high spots, fill low spots, and compact the base before placing frames.

A helpful layout to start with is:
Garden part | Practical starting size |
Growing bed width | About 18 inches for classic narrow beds |
Path width | About 30 to 36 inches |
Bed length | Whatever fits your space and watering setup |
Trellis height | Tall enough for tomatoes, cucumbers, or pole beans |
Don’t get stuck trying to make the whole yard perfect. Focus on straight lines, level beds, and comfortable paths. A clean layout makes planting, watering, feeding, pruning, and harvesting much easier.
Build raised beds that stay straight and easy to work
Raised beds are one of the most popular ways to use the Mittleider method because they give you control. You’re not fully at the mercy of native soil, weeds are easier to manage, and you can build the bed height to suit your space.

For this style, the bed should be narrow enough that you can reach the center without stepping into it. Stepping in the growing area compacts the soil or growing mix, which makes roots work harder.
Good raised bed materials include:
Untreated lumber
Cedar or redwood
Concrete blocks
Metal garden bed panels
Food-safe composite boards
Avoid old railroad ties or questionable salvaged wood that may contain chemicals you don’t want near food crops.
A simple raised bed frame needs to be square, level, and sturdy. Use corner stakes or brackets so the sides don’t bow outward once the mix goes in. If your bed is long, add support stakes along the outside every 30 inches.
Here’s a basic build order:
Mark the bed location with string.
Remove weeds and large rocks.
Level the base where the frame will sit.
Assemble the frame.
Check the frame for square corners.
Level the top edge.
Anchor the sides with stakes or brackets.
Fill with your custom growing mix.

Don’t skip the final level check after the frame is built. Lumber and panels can twist slightly, and a bed that looked level during layout may shift during assembly.
Raised beds also make irrigation simpler. You can run a drip line, soaker hose, or watering pipe down the center and keep the moisture right where the roots need it. That matters because the Mittleider system pairs regular watering with regular feeding. Consistency is the whole point.

If you’re building more than one bed, keep them parallel. It may feel fussy while you’re setting up, but straight beds make trellis lines, watering lines, and paths much cleaner later.
Fill beds with a custom growing mix
One reason people like the Mittleider method is that it doesn’t require perfect native soil. With raised beds, you can use a custom mix that drains well, holds enough moisture, and stays loose for roots.
A common Mittleider-style grow box mix uses sawdust and sand. Many gardeners use a blend close to three parts sawdust to one part sand by volume. The sawdust helps hold moisture and air. The sand adds weight and drainage.
That said, materials vary a lot by region. Coarse sawdust behaves differently than fine sawdust. Washed sand behaves differently than masonry sand. The goal is not to copy a texture blindly. The goal is a mix that:
Drains without turning bone dry in one afternoon
Holds moisture without staying swampy
Doesn’t compact into a brick
Lets roots move easily
Works with a steady feeding plan
Because custom mixes are low in nutrients at the start, the Mittleider method relies on measured fertilizers. Gardeners commonly use a pre-plant mix before planting and a weekly feed during growth. The pre-plant mix usually supplies calcium and other starting nutrients. The weekly feed supplies the regular nutrition plants need as they grow.
Follow a trusted Mittleider recipe for the fertilizer blends rather than guessing. More fertilizer is not better. The method works because the feeding is steady and measured, not because plants get blasted with nutrients.
When filling a raised bed, lightly moisten the mix as you go. Dry sawdust can repel water at first, and a completely dry bed is harder to settle evenly. Fill the bed, water it thoroughly, let it settle, then top it off if needed.
A few tips make this part easier:
Mix materials outside the bed if you can.
Break up clumps before filling.
Keep the surface flat, not mounded.
Water deeply before planting.
Label your fertilizer containers clearly.
You can plant directly into the custom mix once it’s moist and amended according to your plan. After that, roots, water, and nutrients all stay concentrated in a small growing zone, which is exactly what this method is designed to do.
Add a trellis system before plants need it
Trellising is where the garden really starts to look organized. It also saves space, improves air flow, keeps fruit cleaner, and makes harvesting less of a treasure hunt.
The mistake is waiting too long. If you install posts and wire after tomatoes or cucumbers are already sprawling, you’ll break stems and make the job twice as hard. Put the trellis system in when you build the bed or right after you fill it.
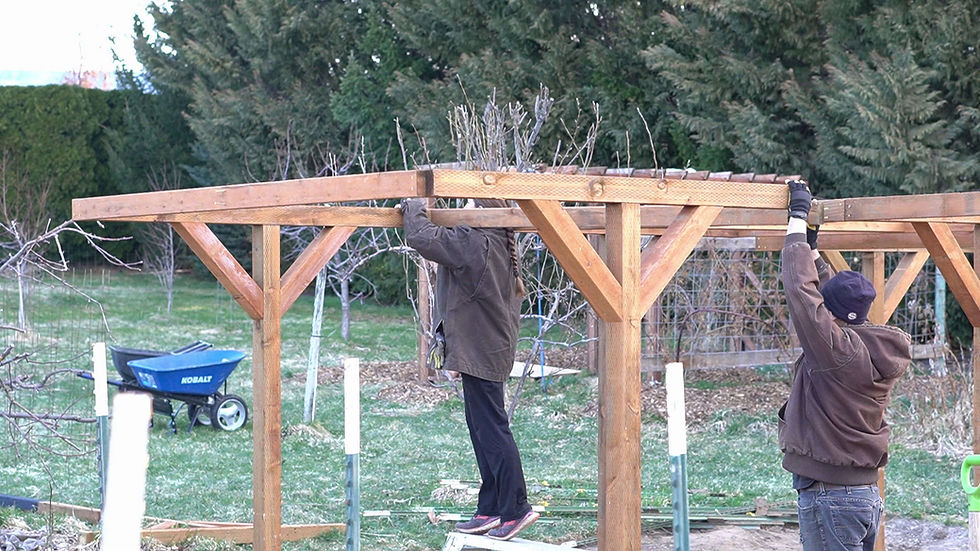
A strong trellis system usually includes:
End posts
Optional center support posts for long beds
Top wire
Plant training strings
Anchors or braces
Clips, ties, or soft garden twine
For posts, you can use pressure-treated posts outside the growing area, metal T-posts, or sturdy untreated wood. The key is strength. A row of mature tomatoes can get heavy fast, especially after rain.
Set end posts deeply enough that they don’t wobble. If the bed is long, add intermediate posts so the top wire doesn’t sag. Run a strong wire along the top of the posts. This top wire carries the training strings for climbing plants.
Use wire that can handle tension. Thin craft wire won’t cut it. Galvanized 9 gage wire is a common garden choice because it holds up outdoors. Tighten it well, but don’t crank so hard that posts lean inward.
For vertical crops, tie strings from the top wire down to the base of each plant. Tomatoes, cucumbers, melons, and pole beans can all benefit from support, though each one needs slightly different handling.
Tomatoes can be trained up a string with gentle clips or loose wraps. Cucumbers grab more easily but still need guidance early on. Melons may need slings for heavy fruit. Pole beans usually climb with very little help once they find the string. I like adding a cattle panel tunnel for my climbing beans.

A lower wire can help too. It gives you a place to anchor strings, guide young plants, or keep the system tidy. Some gardeners run a low wire along the bed and tie vertical strings between the lower and upper wire. Others anchor strings near each plant with a small stake or clip.
Keep these trellis rules in mind:
Build stronger than you think you need
Keep wires straight and tight
Use soft ties that won’t cut stems
Check tension during the season
Prune and train plants before they tangle
A trellis isn’t just extra support. It changes how the whole bed works. Plants grow upward instead of outward, leaves dry faster after rain, and fruit is easier to see.
Use soil beds if you want a simpler option
Raised beds are great, but they’re not the only option. A soil bed is a solid choice if your native soil is workable and you want to spend less on materials.
In the Mittleider method, a soil bed is usually a narrow, level growing strip formed directly in the ground. Instead of building a box and filling it with custom mix, you shape the native soil into a bed and leave clear walking paths beside it.
This option works best when the soil:
Drains reasonably well
Isn’t packed hard like concrete
Has no major contamination concerns
Can be leveled without major earthwork
Is easy enough to weed and shape
To build a soil bed, mark the bed with stakes and string just like you would for a raised bed. Level the growing strip, then pull soil from the path area toward the bed to create a slight raised shape. Keep the top flat. The bed should not be a rounded mound, because water and nutrients can roll off the sides.
You can still use the same ideas:
Raised bed | Soil bed |
Uses a frame | Formed directly from native soil |
Filled with custom mix | Uses existing soil with amendments |
Costs more up front | Costs less to start |
Easier soil control | More dependent on local soil |
Very tidy layout | Simple and flexible |
Soil beds still need careful watering, regular feeding, and good trellising. The method doesn’t become casual just because there’s no wooden frame. The bed still needs to be level. The paths still need to stay clear. The plants still need consistent nutrition.
If you’re unsure which route to take, start with one or two soil beds and one raised bed. After a season, you’ll know which one fits your garden, budget, and maintenance style better.

Keep the setup easy to manage all season
The best garden setup is the one you can maintain when life gets busy. A clean Mittleider-style layout helps because every part has a job.
The beds hold the growing area. The paths give you access. The custom soil or shaped soil bed supports roots. The fertilizer plan feeds plants steadily. The trellis keeps crops upright. The wire gives the whole system structure.
A few habits keep it working:
Walk the garden often, even if only for five minutes.
Watch for sagging trellis wire after storms.
Keep paths weeded so they don’t creep into beds.
Water deeply and consistently.
Feed on schedule using measured amounts.
Train vines while they’re young and flexible.
Remove damaged leaves when you see them.
Don’t feel like the whole garden has to be huge right away. A pair of well-built beds can teach you more than a sprawling garden that’s hard to keep up with. Start with a layout you can manage, then add more beds once the system feels natural.
The Mittleider method rewards careful setup. Level the site. Build straight beds. Use the right growing mix or shape clean soil beds. Add strong posts and wire before the plants need help. Once those pieces are in place, planting and upkeep feel much less chaotic.
A good garden doesn’t happen by accident. Build the structure first, and the plants have a much better chance to do what they’re supposed to do: grow, climb, flower, and feed you.





Comments